 Jan Slifka
Integration questions are a great way to increase interoperability, machine-actionability, and overall FAIRness of the data management plans. They are connected to an external database or repository, such as FAIRsharing or Research Organization Registry. Then, researchers can pick values from these repositories directly when creating their data management plan.

We covered configuring these integrations in a blog post How to Configure Integration Question in FAIR Wizard. In this blog, we will focus on a different scenario. Sometimes, we don't have this external service to connect to, but we still have some values we want to offer to researchers to choose from. Instead, we only need to create a CSV file and do a little bit of configuration in the Integration Hub.
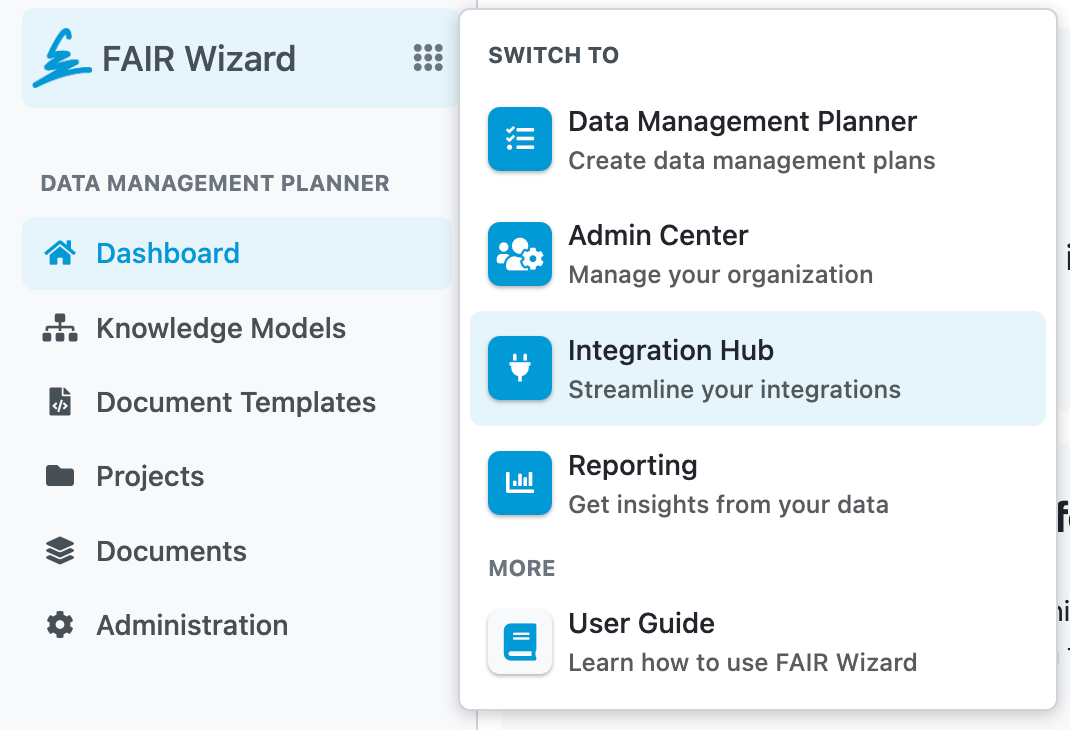
Integration Hub is an app of FAIR Wizard where we can configure integrations. Let's start by switching to it using the app switcher in the menu.
In this tutorial, we will create an integration of countries to select from using an example CSV file. You can download the file to follow, or you can use your own CSV file.
Now, with the CSV file ready, navigate to Value Integrations in the menu and click on Create. We must fill in the integration Name and ID here. We fill in the name Countries, and the ID gets autofilled to countries. Then, we click on Create to create the new integration.
We are now on the value integration detail, where we can change the Name and the ID if we want to. We can also configure the Response Item Template that defines how the options will eventually look for the researchers in questionnaires, and Search Fields that defines which fields will be used for search when researchers type something in the integration questionnaire.
But before that, we need the values to have some data to test our template. So navigate to Values in the left menu. Here, we can create the values manually by adding the columns and rows or just import a CSV file we already have.
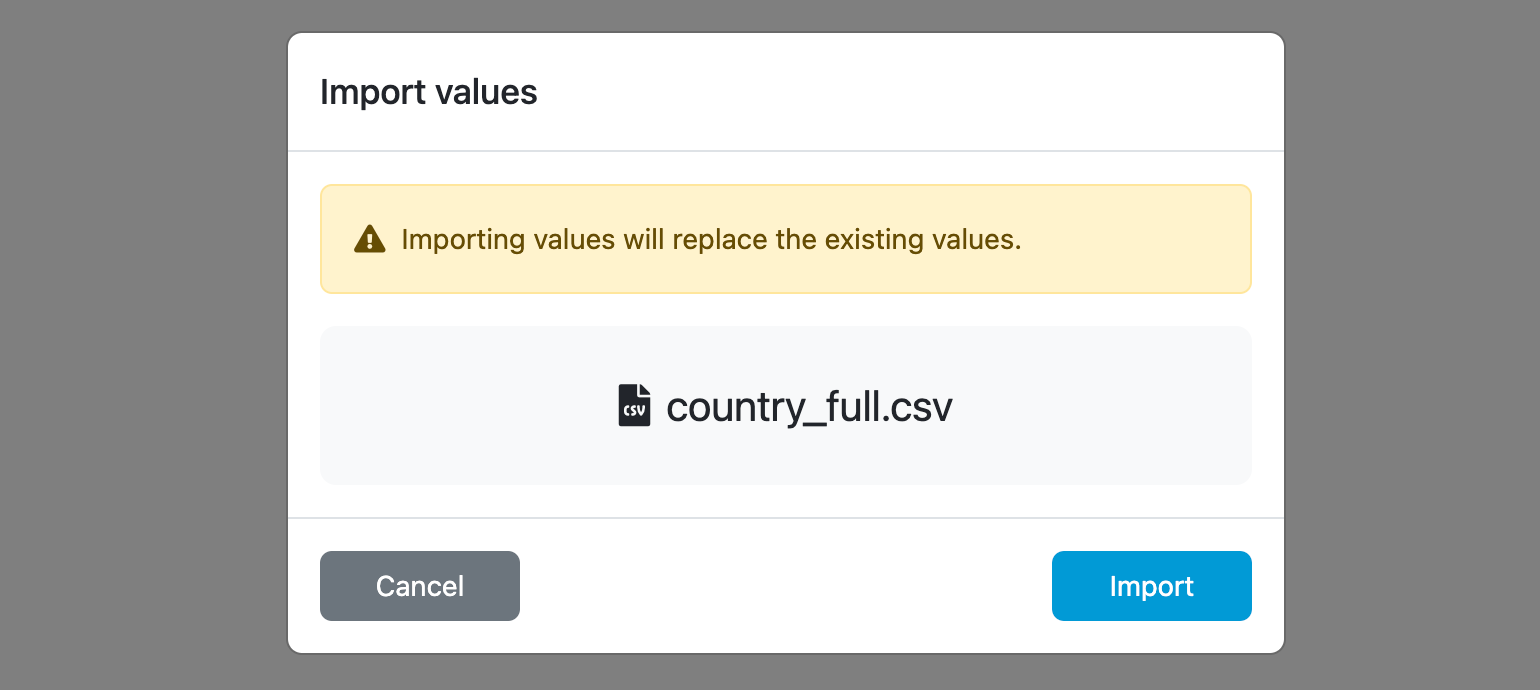
So click on Import and select the CSV file by clicking on Choose CSV file or drag and drop it into the modal window and click on Import.
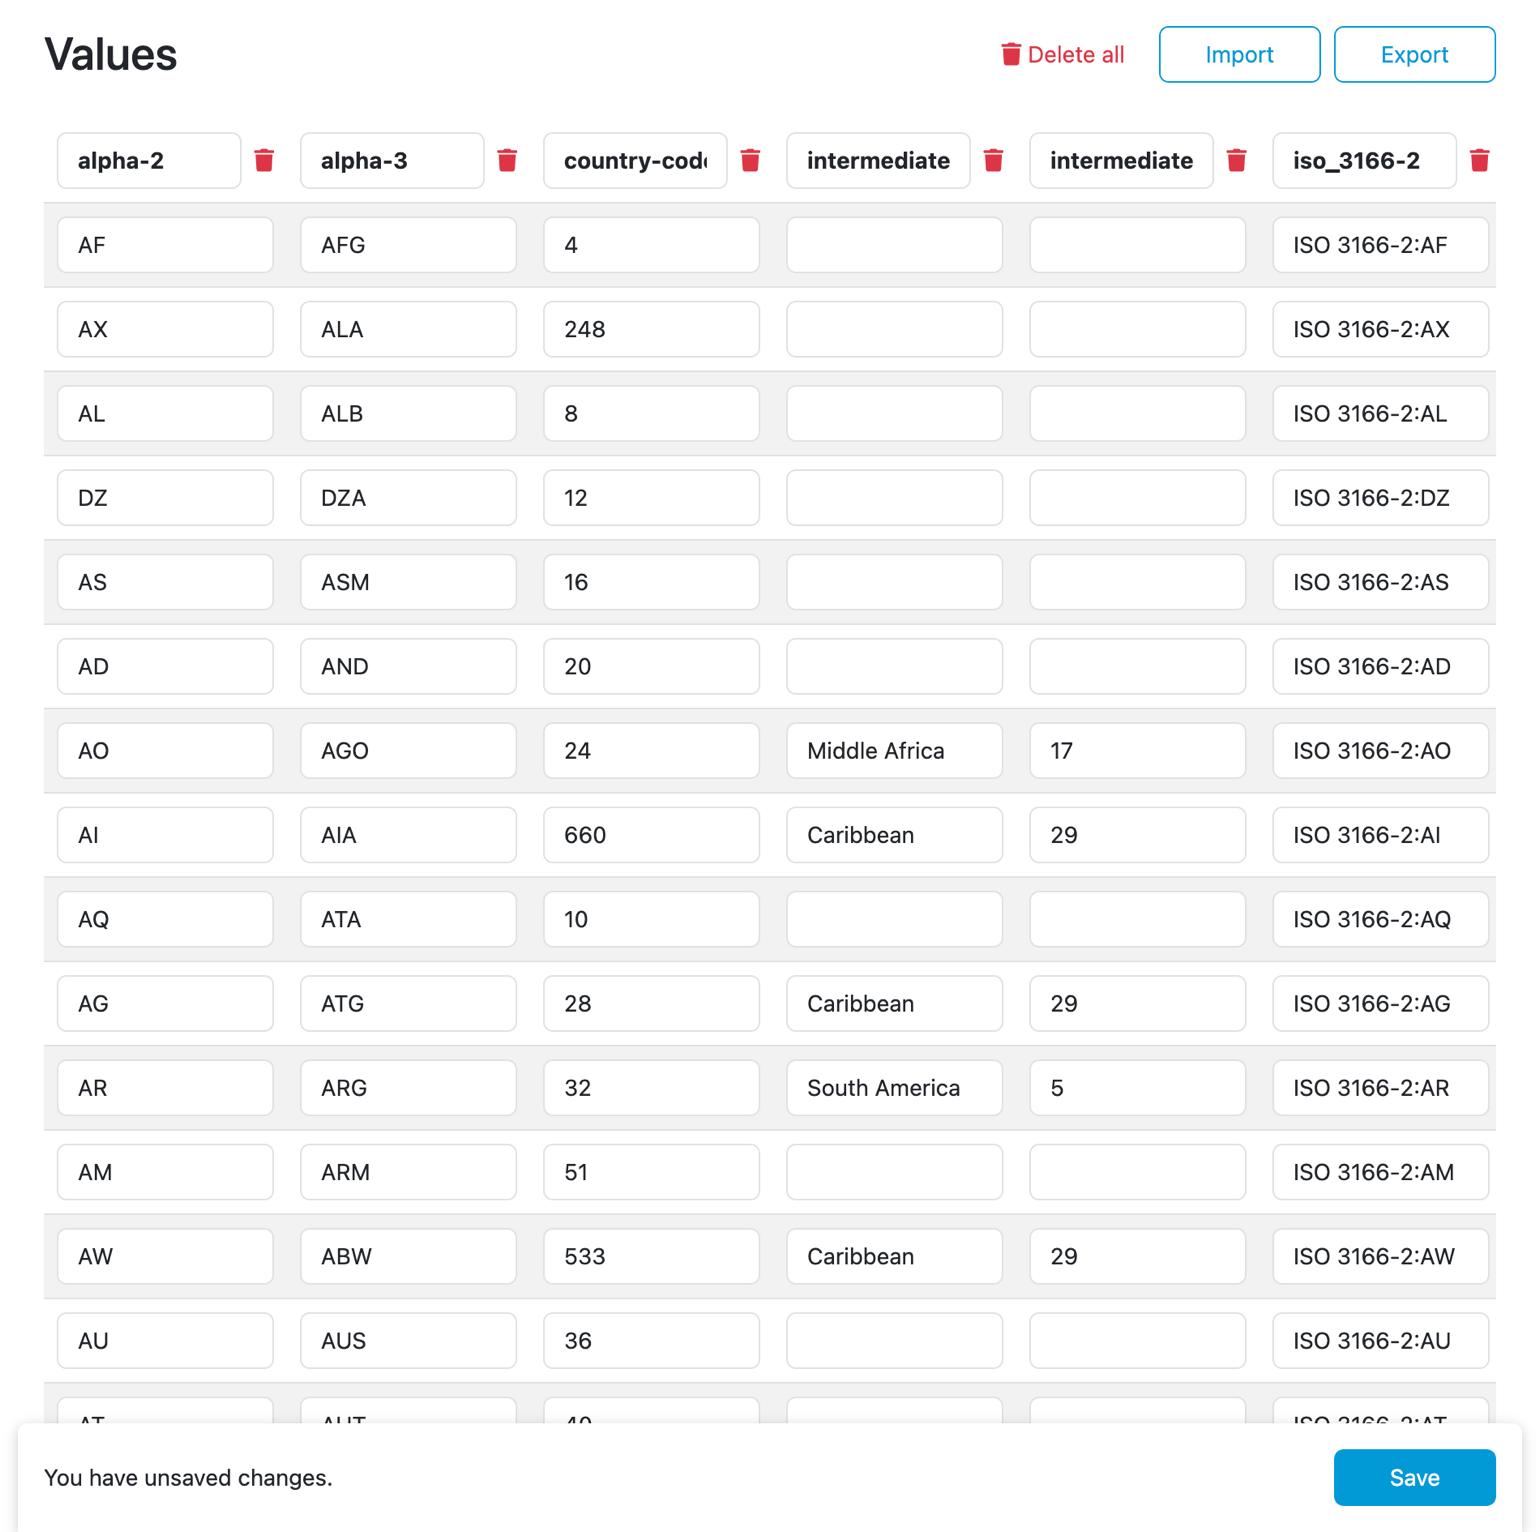
We can now see the whole table and its values in the UI. Then, we click on Save to save the new data. Note that the columns will get sorted alphabetically, which is unimportant for further configuration.
We can also edit the data here if we need to update something. We can also Export the data, edit the CSV file, and Import it back. Note that importing a CSV file will replace all values with the new data.
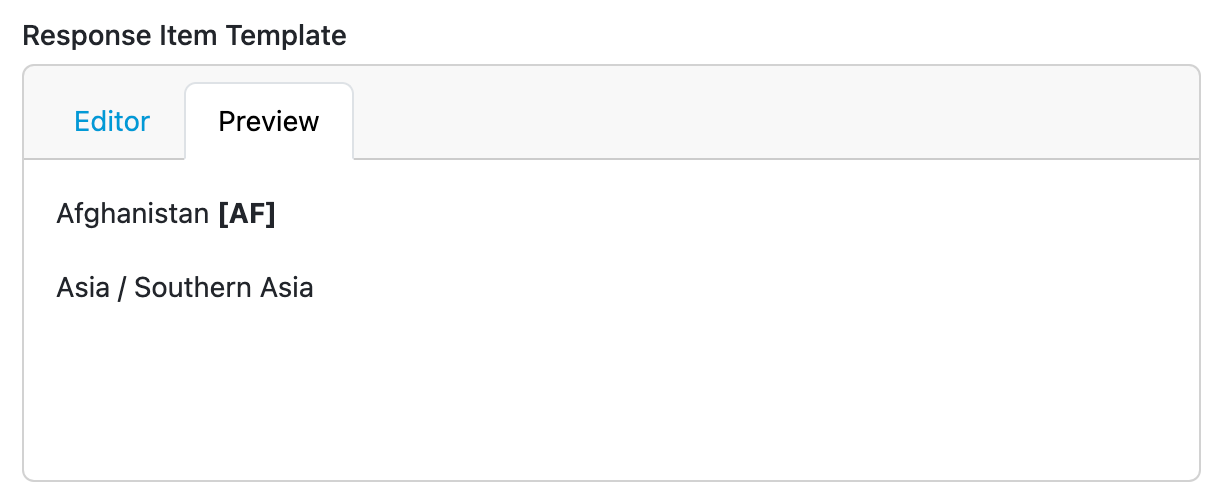
With the saved values, we can navigate to the Info page and configure the Response Item Template. In this field, we create a template of how the item of this integration will look in the questionnaire. We can use Jinja2 notation for accessing the properties from the CSV file using column names like {{ item.<column name> }}. We can also use Markdown for formatting.
In this template, we will show the country name together with its code in square brackets and in bold. There is an issue with the country code column name. It is called alpha-2. However, we can't use - in the column name like this {{ item.alpha-2 }} because the templating language would parse it as a minus. Instead, we need to use the dict notation {{ item["alpha-2"] }}. This would work for all the fields, but usually, it's more convenient to use the dot notation, like for the name {{ item.name }}.
The full template looks like this:
{{ item.name }} **[{{ item["alpha-2"] }}]**
If we open the Preview tab, we will see the first items from the values rendered using the template.

This template is very basic, but there are options for how to create something more complex. We covered that in the blog post How to Improve Integration Question Item Template in FAIR Wizard.
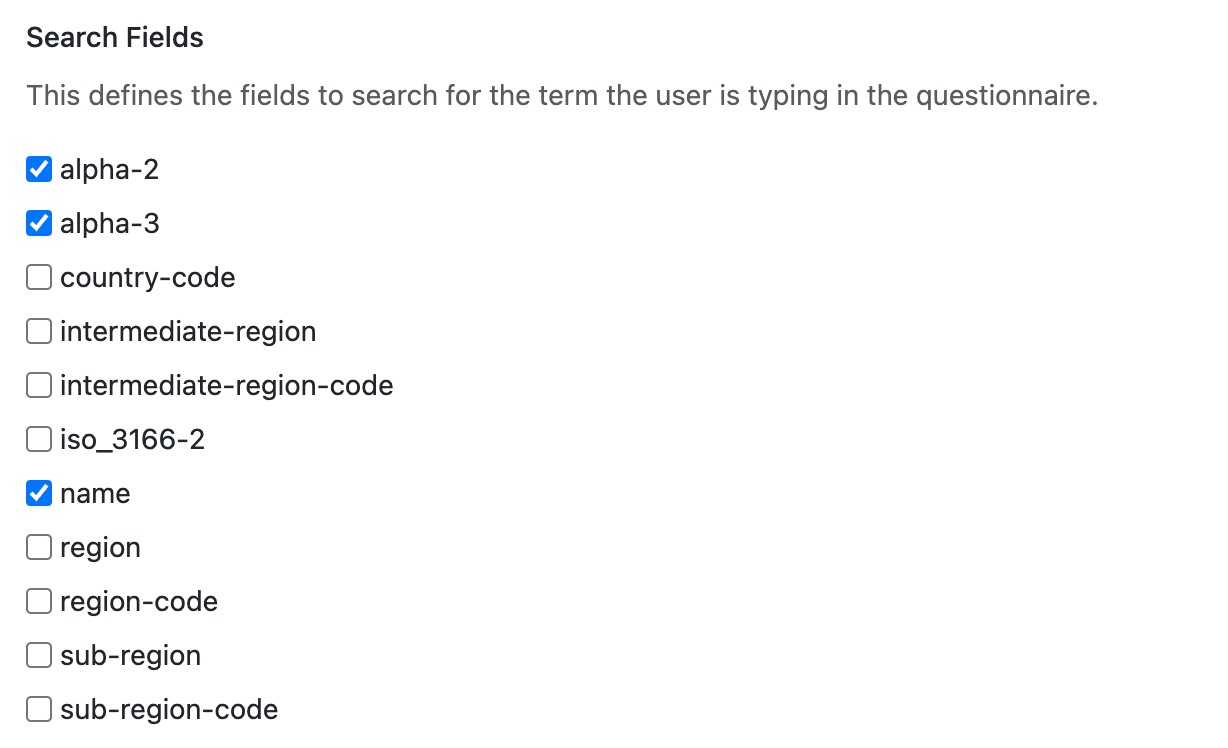
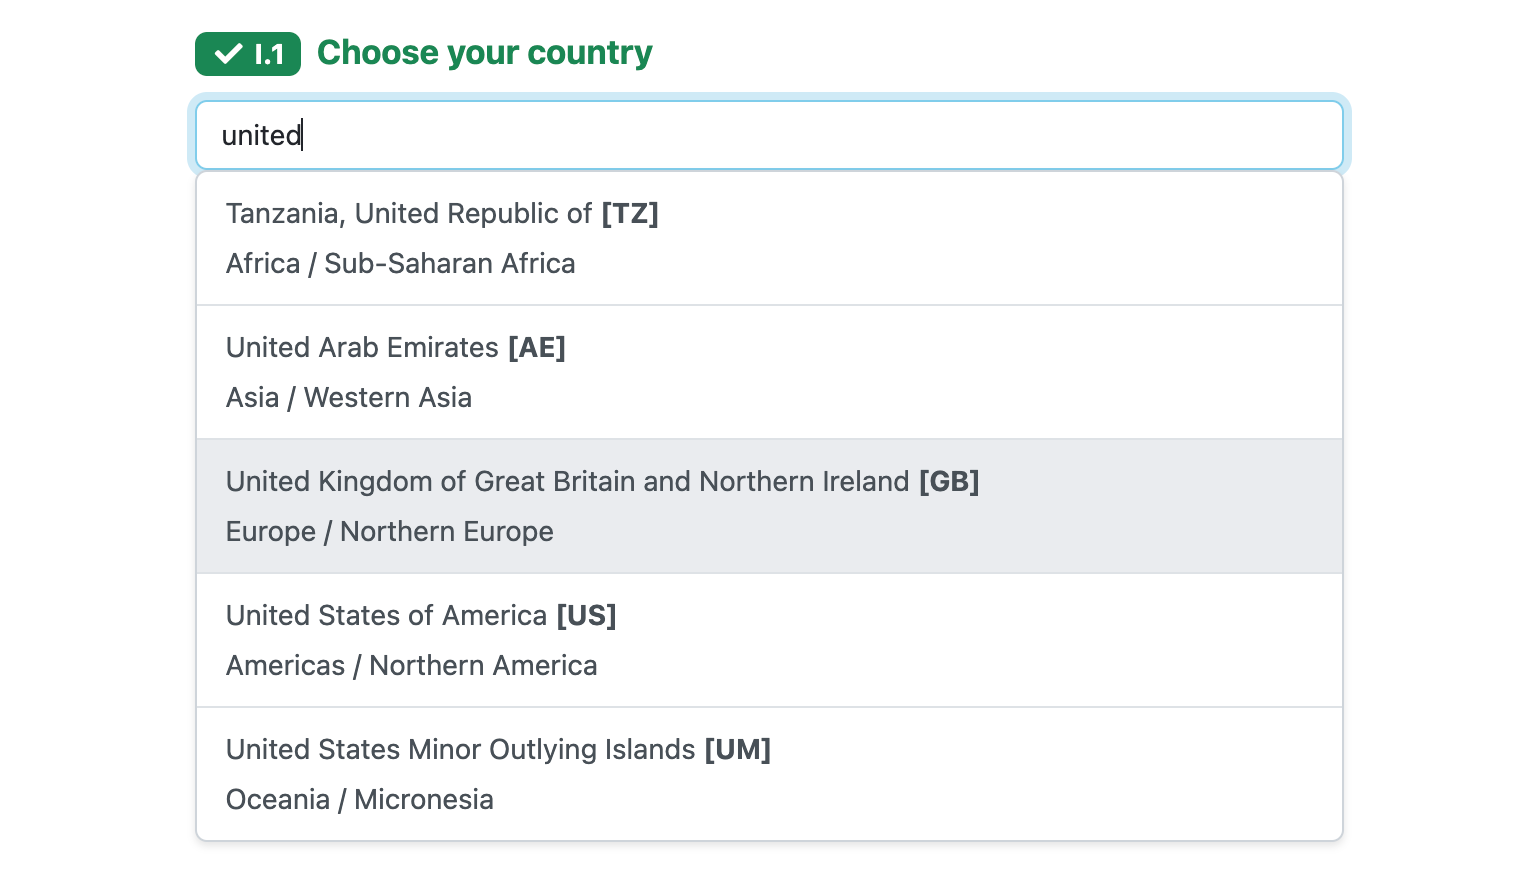
Then, we choose the Search Fields. We select name, alpha-2, and alpha-3, so that researchers can search for the country by its name or code.
Don't forget to click on Save to save the new Response Item Template and the Search Fields. That's all we needed to set up the value integration. Now, we can move to the Data Management Planner and use this integration in the knowledge model editor.
Use the app switcher in the menu again to move to Data Management Planner. Then navigate to the Knowledge Models → Editors and click on Create to create a new knowledge model editor. Alternatively, you can use an existing one if you want to add the new integration there.
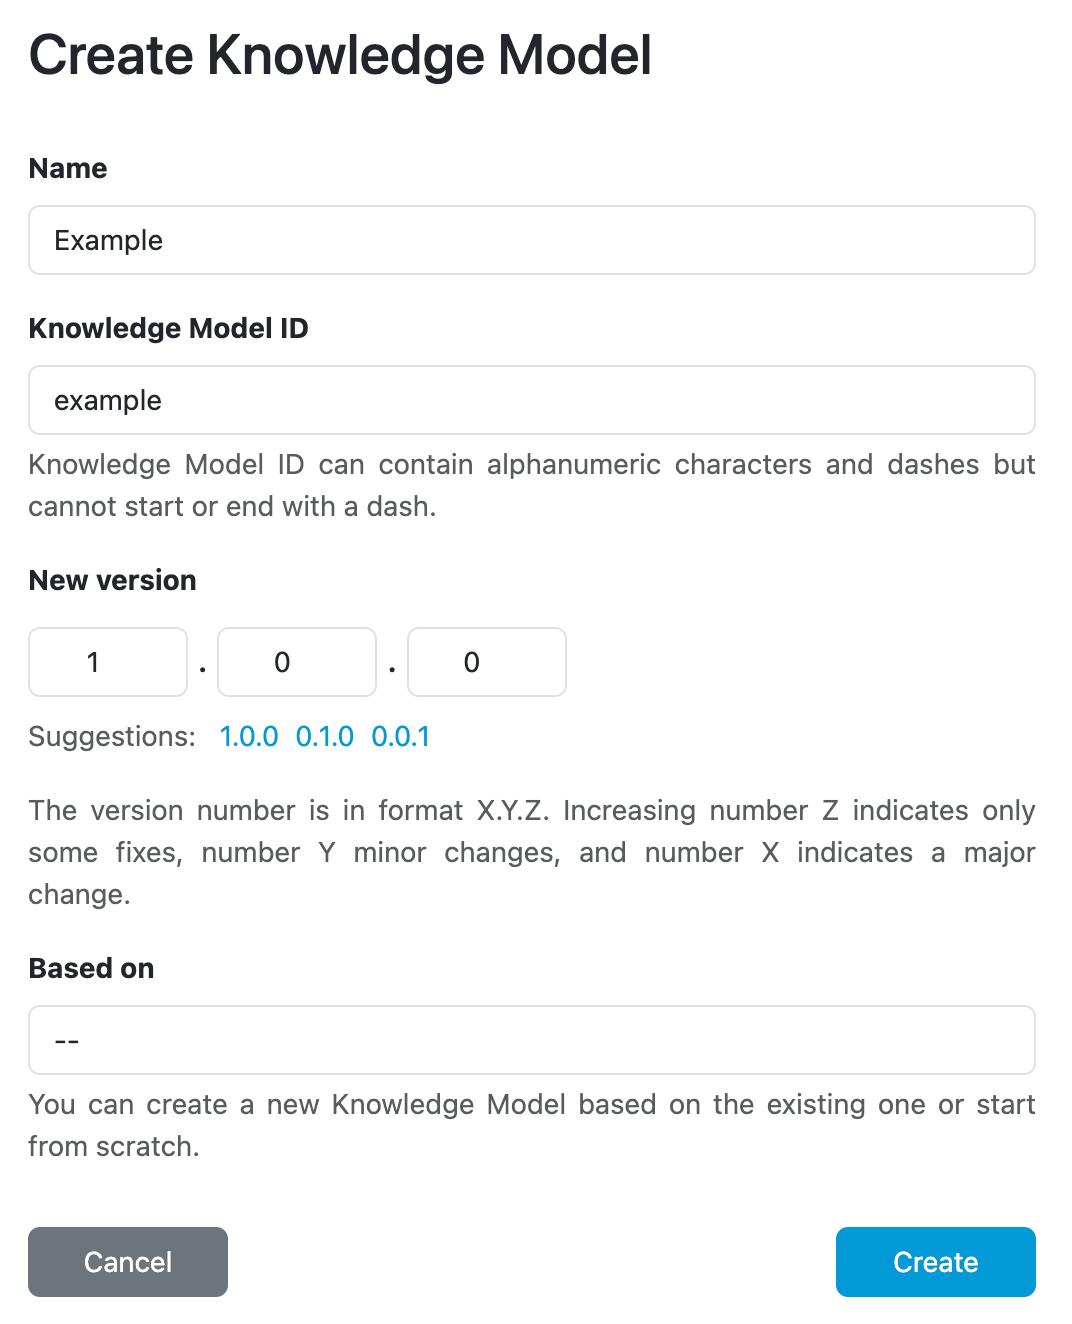
Here, we create an example knowledge model called Example. We make sure that Based on is empty to start with an empty knowledge model, and finally click on Create.
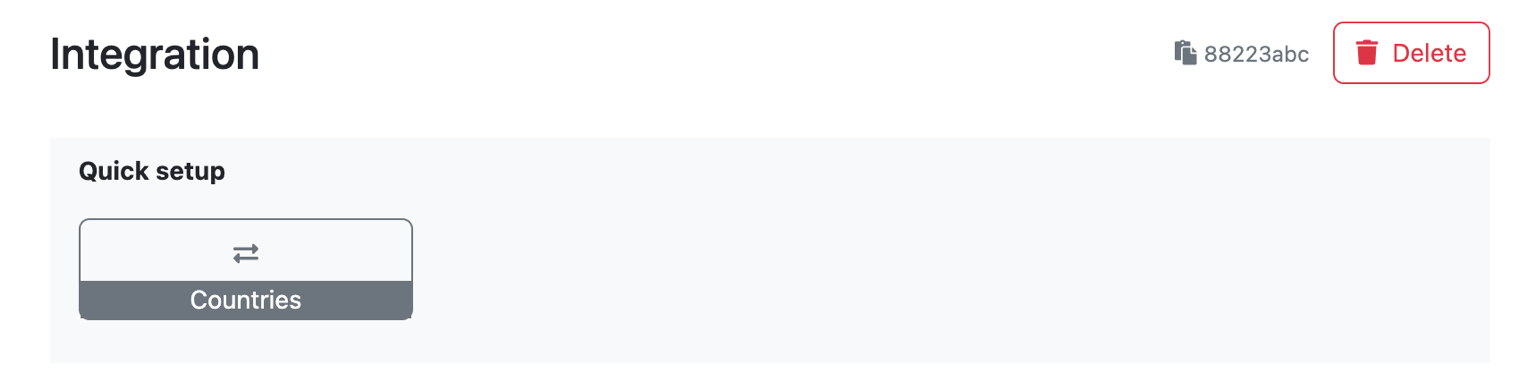
In the knowledge model editor, we first add a new integration. So scroll a bit down and click on + Add integration.
There are a lot of fields to fill. However, we don't have to do that because we can use the Quick setup instead. We should see our new integration there. So click on it, and all the necessary fields should be filled in.
Now, we use the integration in a question. Navigate back to the knowledge model using the tree menu on the left or breadcrumbs at the top. Click on + Create chapter to create a chapter first because a question needs to be in a chapter. Give it some name, such as Chapter 1.
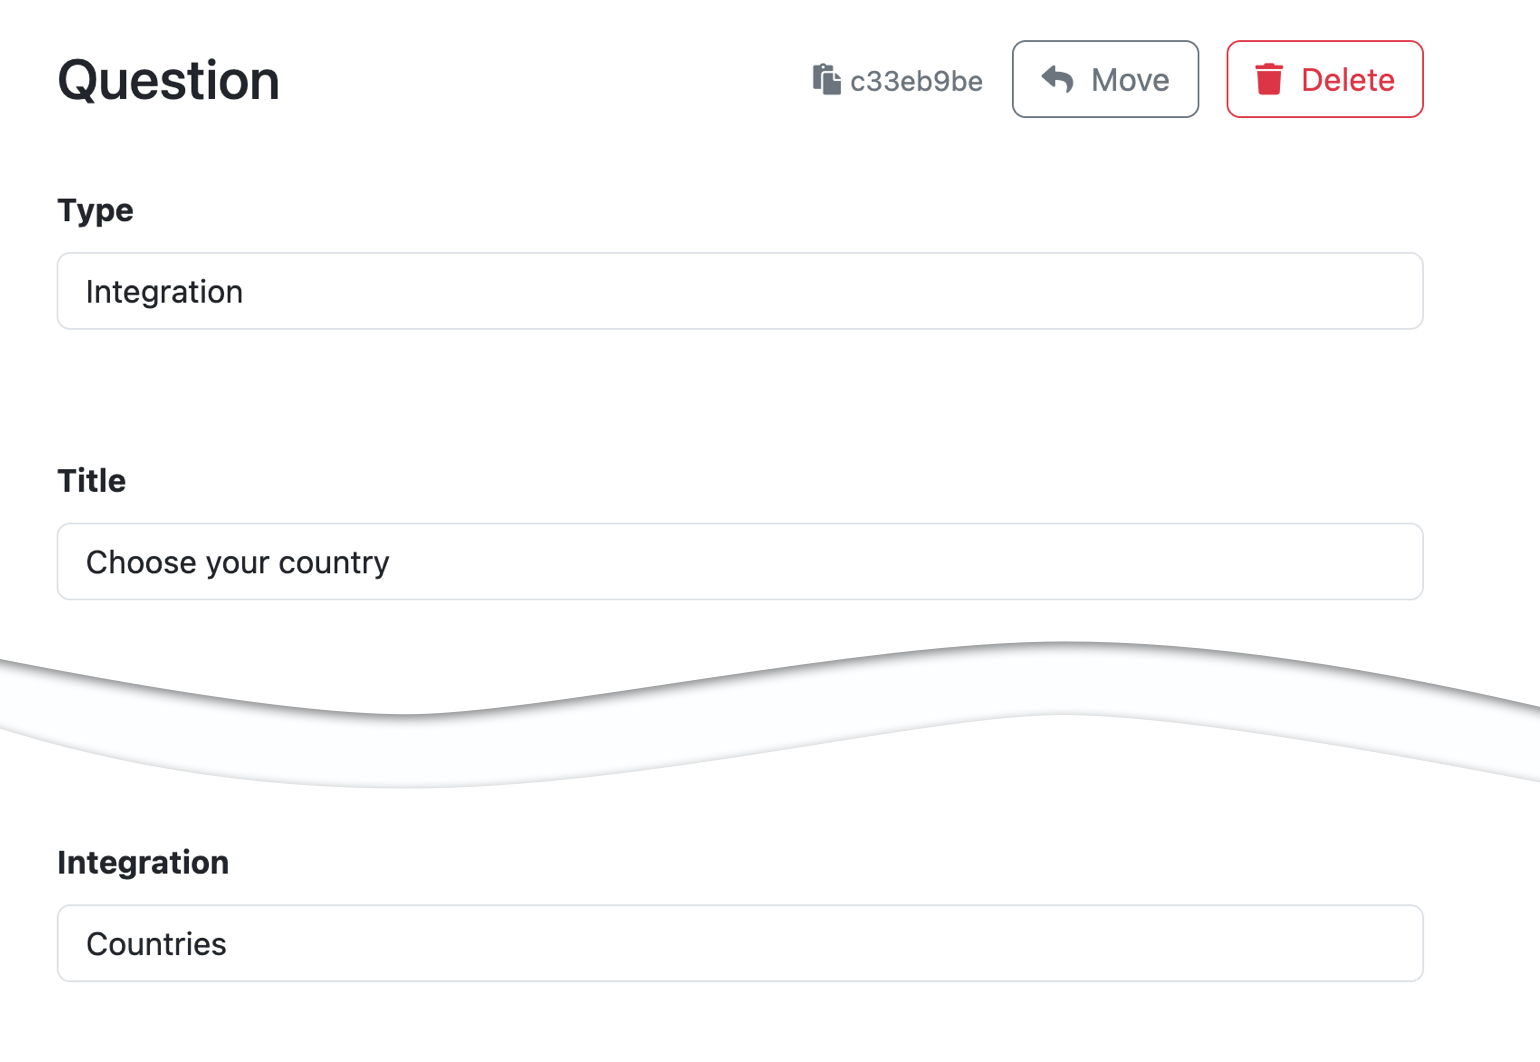
Then, click on + Add question to create a new question. Change the question Type to Integration, and change Title to Choose your country. Scroll a bit more down and select the Integration to Countries, which is our new integration.
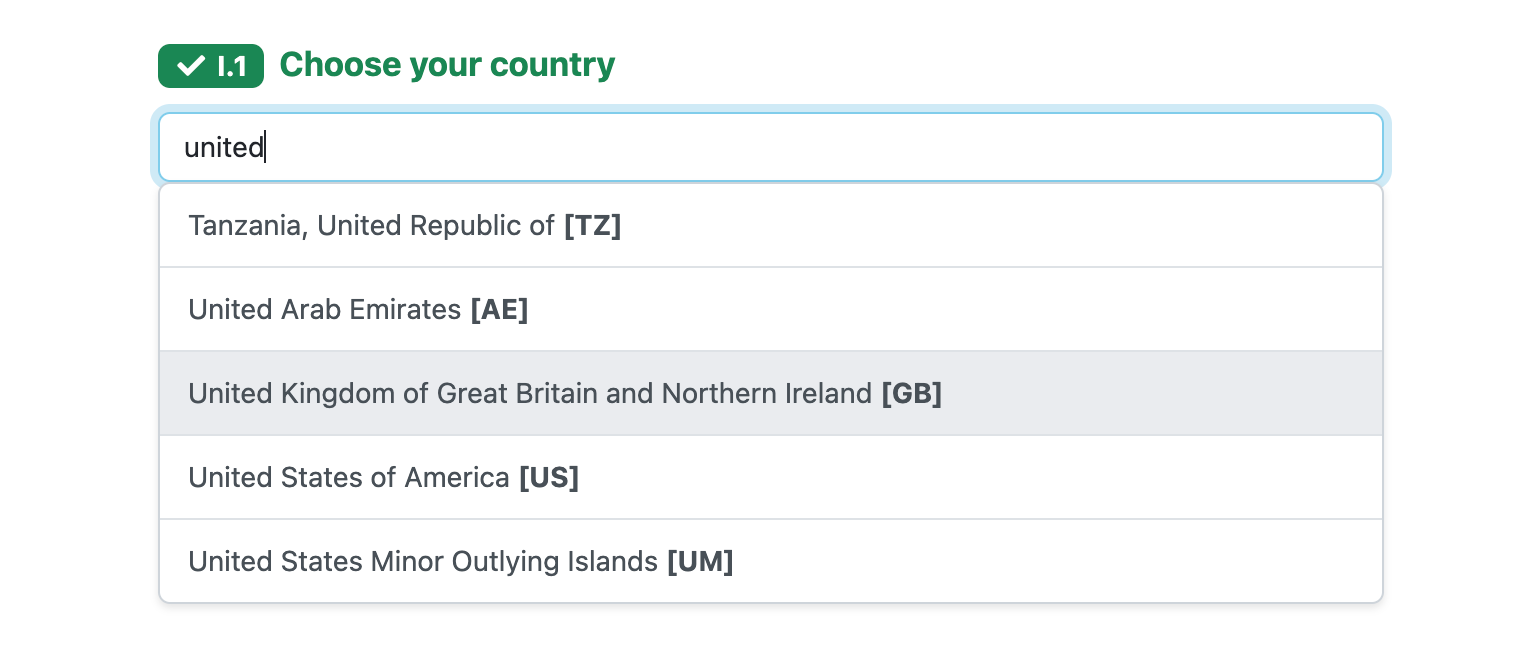
We are all set and can navigate to the Preview tab. We should see the suggestions from the CSV file we imported earlier when filling something in the integration question.
At some point, we might want to update our value integration after it has already been used in a knowledge model. This can involve some extra steps based on what we update.
First, we should never change the ID because the connection between the value integration and the integration in the knowledge model editor is made based on it. If we really need to do that, we must create a new integration in the knowledge model editor and update all the questions accordingly.
If we update the Values or the Search Fields, we don't have to do anything in the knowledge model editor because these are only used on the backend.
The problematic fields are Name and Response Item Template because these fields are copied into the integration configuration in knowledge model editor. Let's look at how to correctly update the Response Item Template so that everything works.
Navigate back to the Integration Hub and open the value integration detail. We will update the Response Item Template to also include the region and the sub-region:
{{ item.name }} **[{{ item["alpha-2"] }}]**

{{ item.region}} / {{ item["sub-region"] }}
Save it, navigate to the knowledge model editor, and open the detail of the integration. This time, we will see information that the integration template was changed.
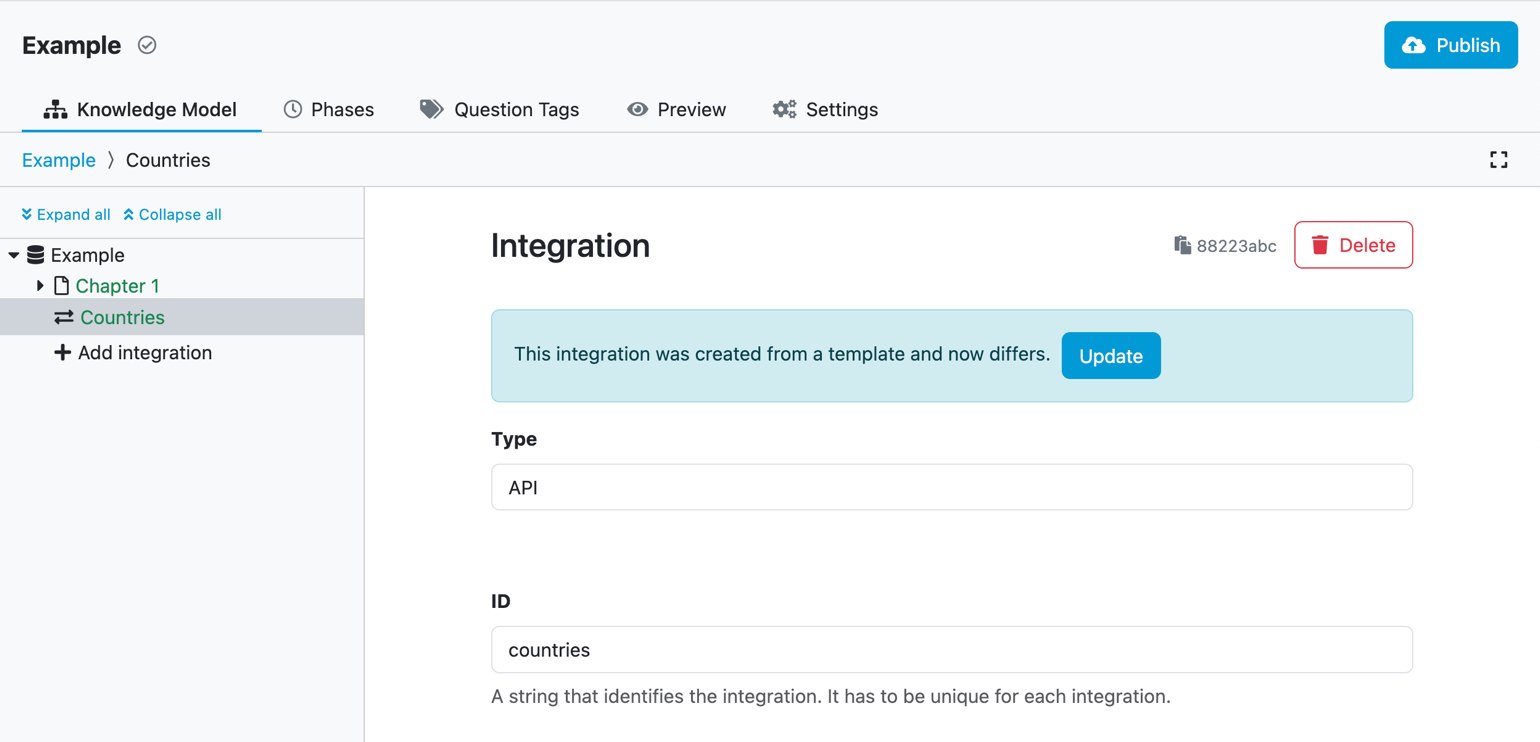
We can click on Update to get the latest Response Item Template. Then, we can go to Preview to check that the integration question works correctly with the new template.
In this blog post, we have learned about how to use CSV files to suggest the values for the researchers when they fill data management plans:
We can use this for any set of values we like, and we can modify the item template to look nice to make filling out data management plans for researchers easier.