 Jan Slifka
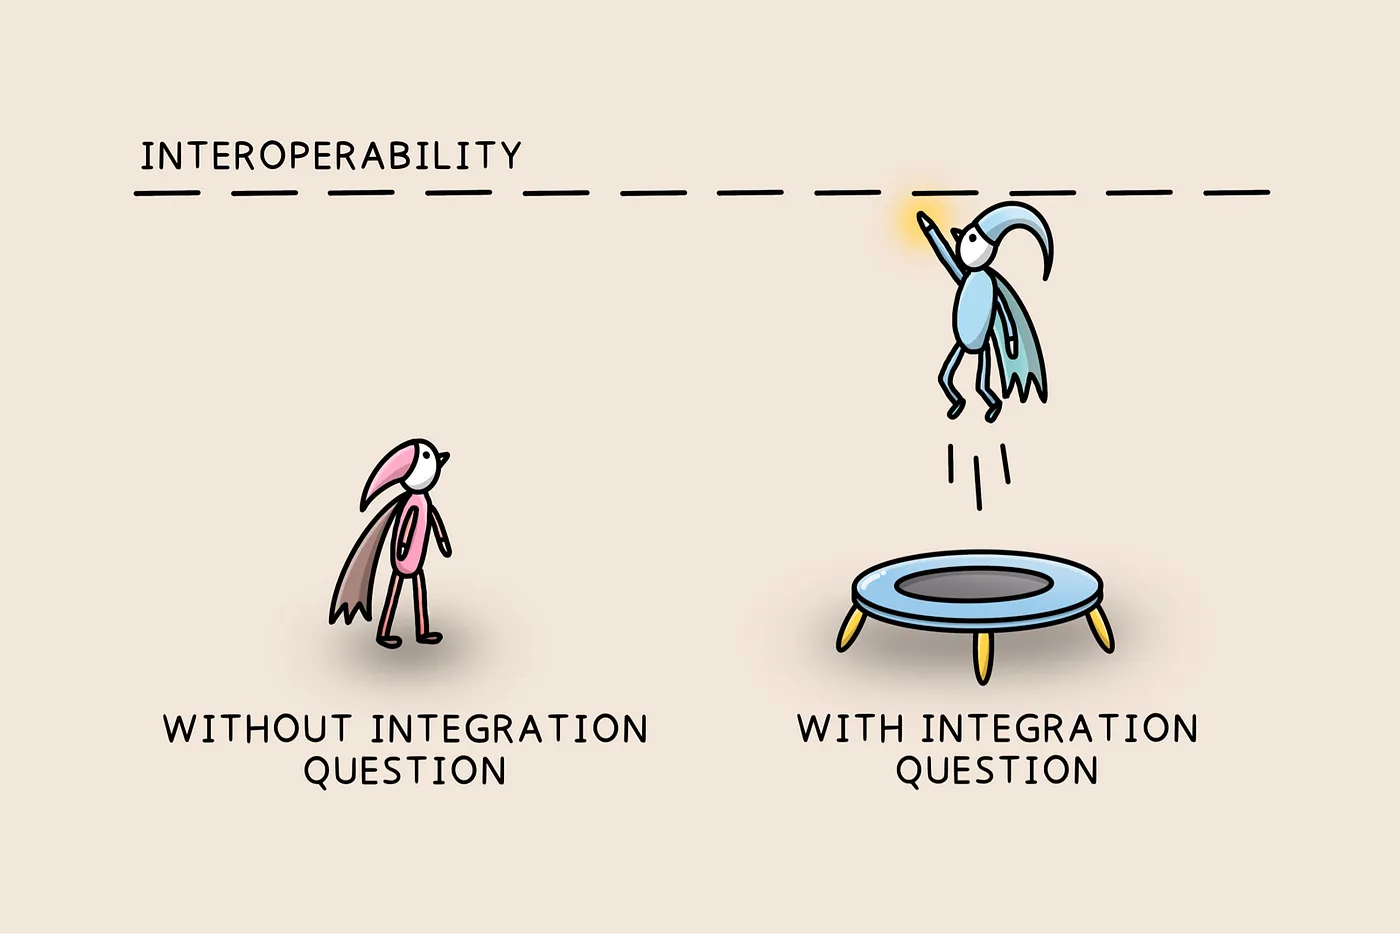
The integration question provides a way to connect a question to an external repository. The answer to that question also contains a link to the selected item that can be used for further processing, promoting machine-actionability and FAIR.
When we want to connect to some external repository, there are some requirements it has to comply to:
In this tutorial, we will use bio.tools — bioinformatics tools and services discovery portal. It fulfills all our requirements, so it is perfect for this example.
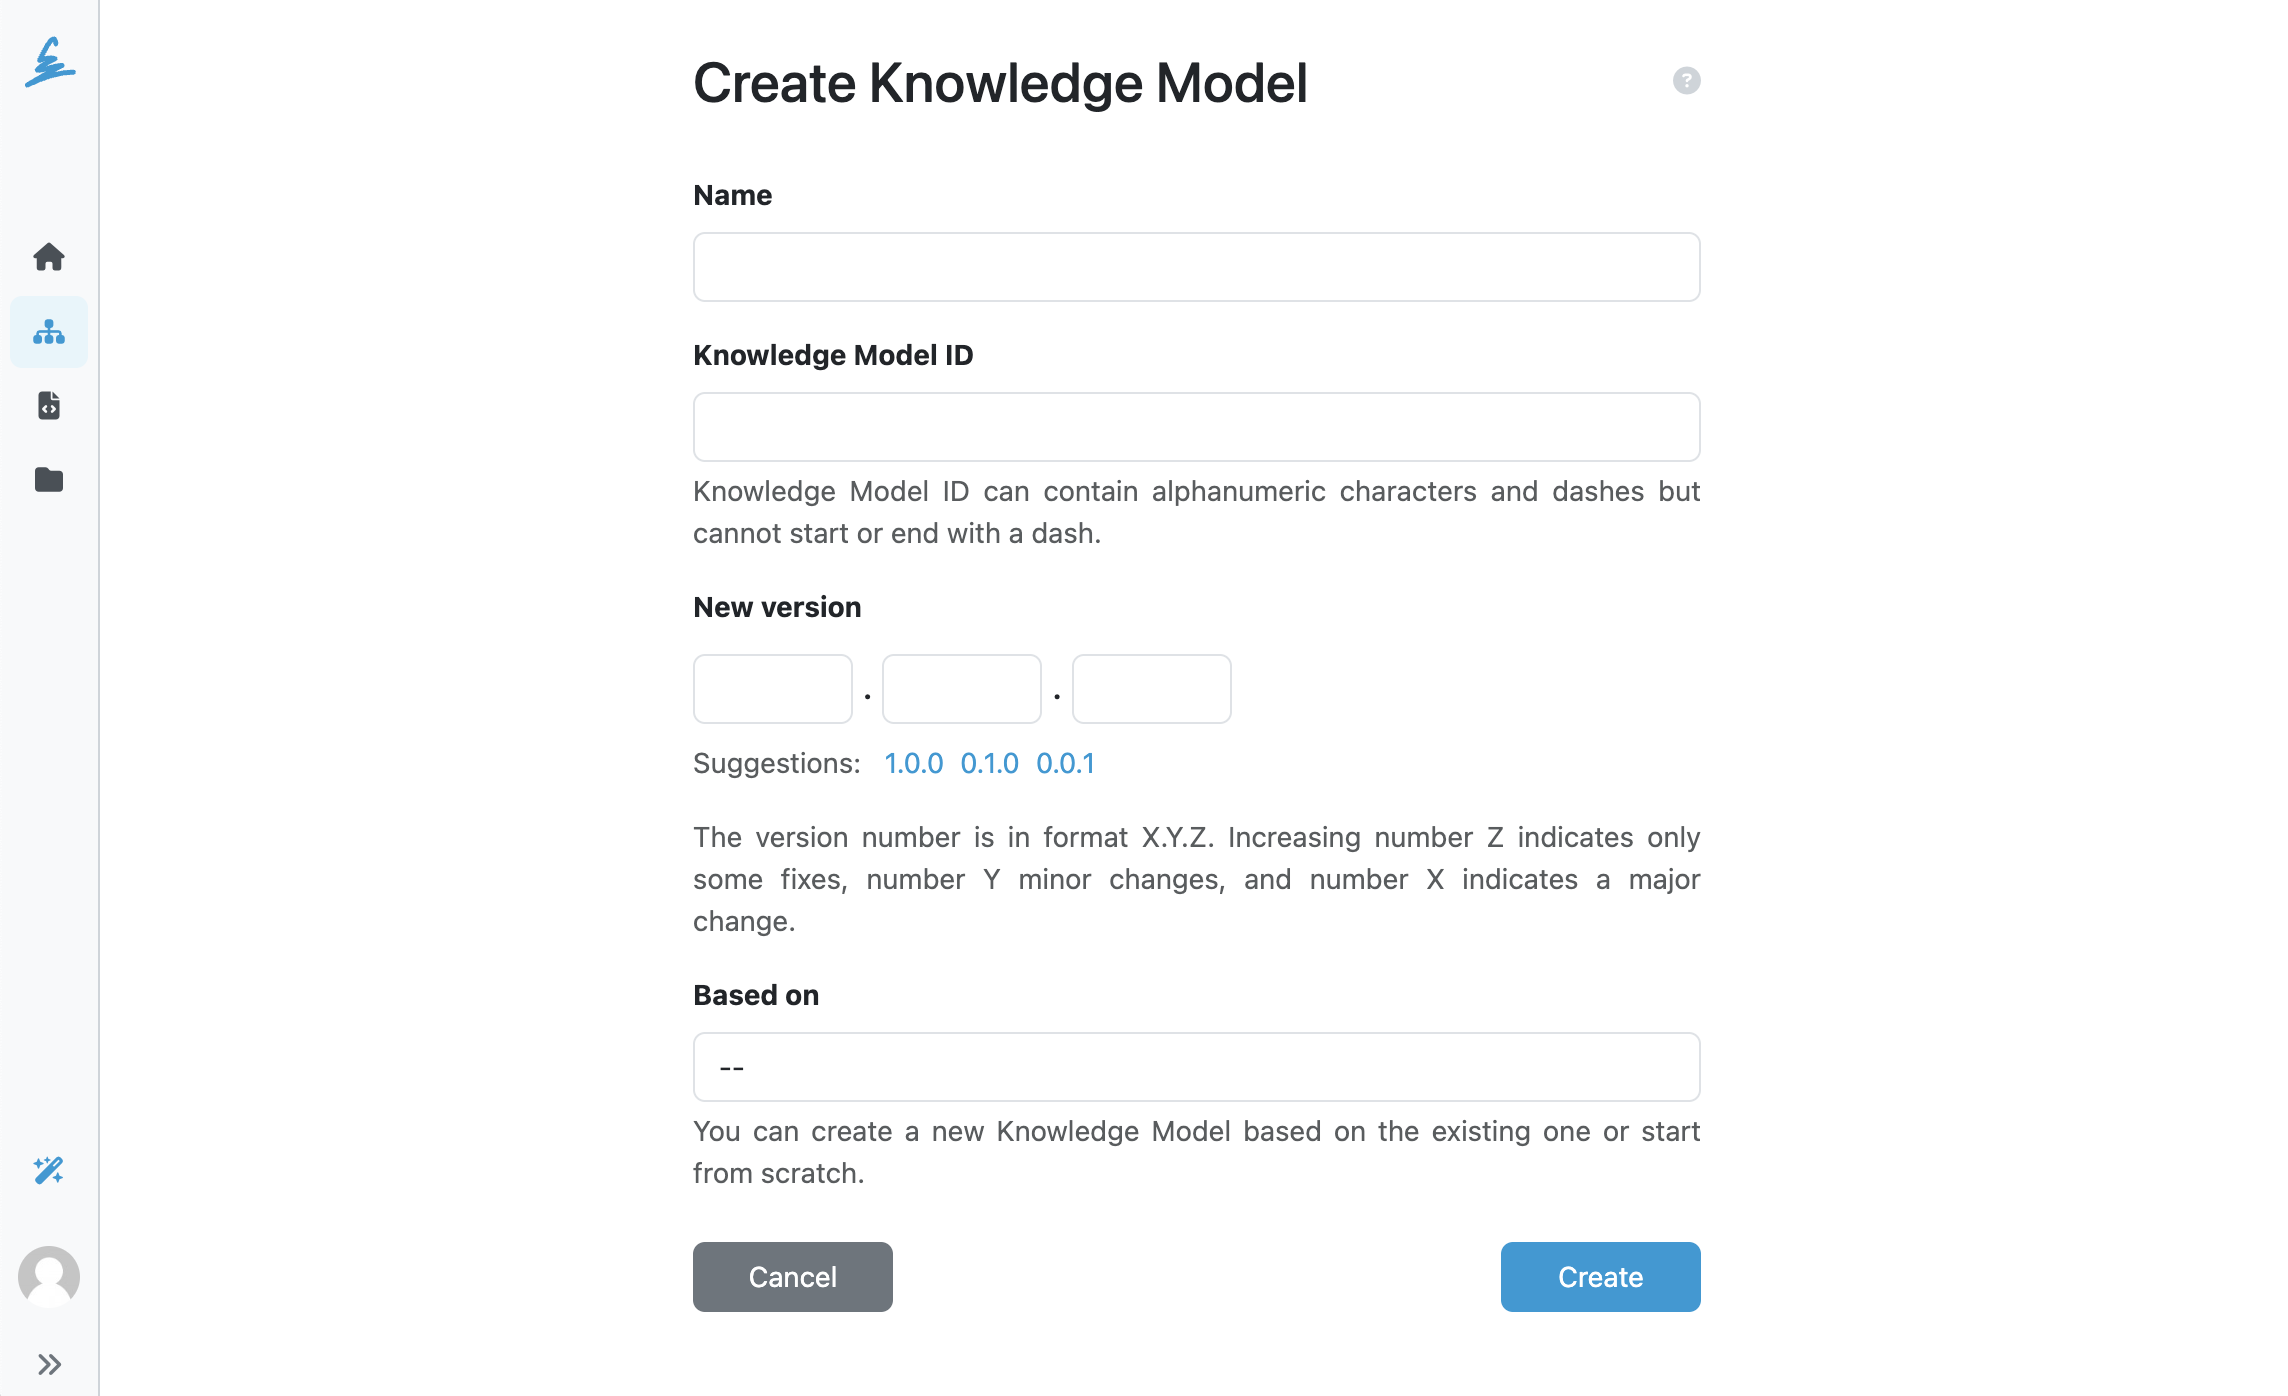
First, we go to the knowledge model editor and create a new knowledge model from scratch (without selecting any Based on knowledge model). We just need to give it a name, ID and the initial version and click Create.
We need to configure the integration before we can use it with questions. Then, we can reuse it in multiple integration questions.
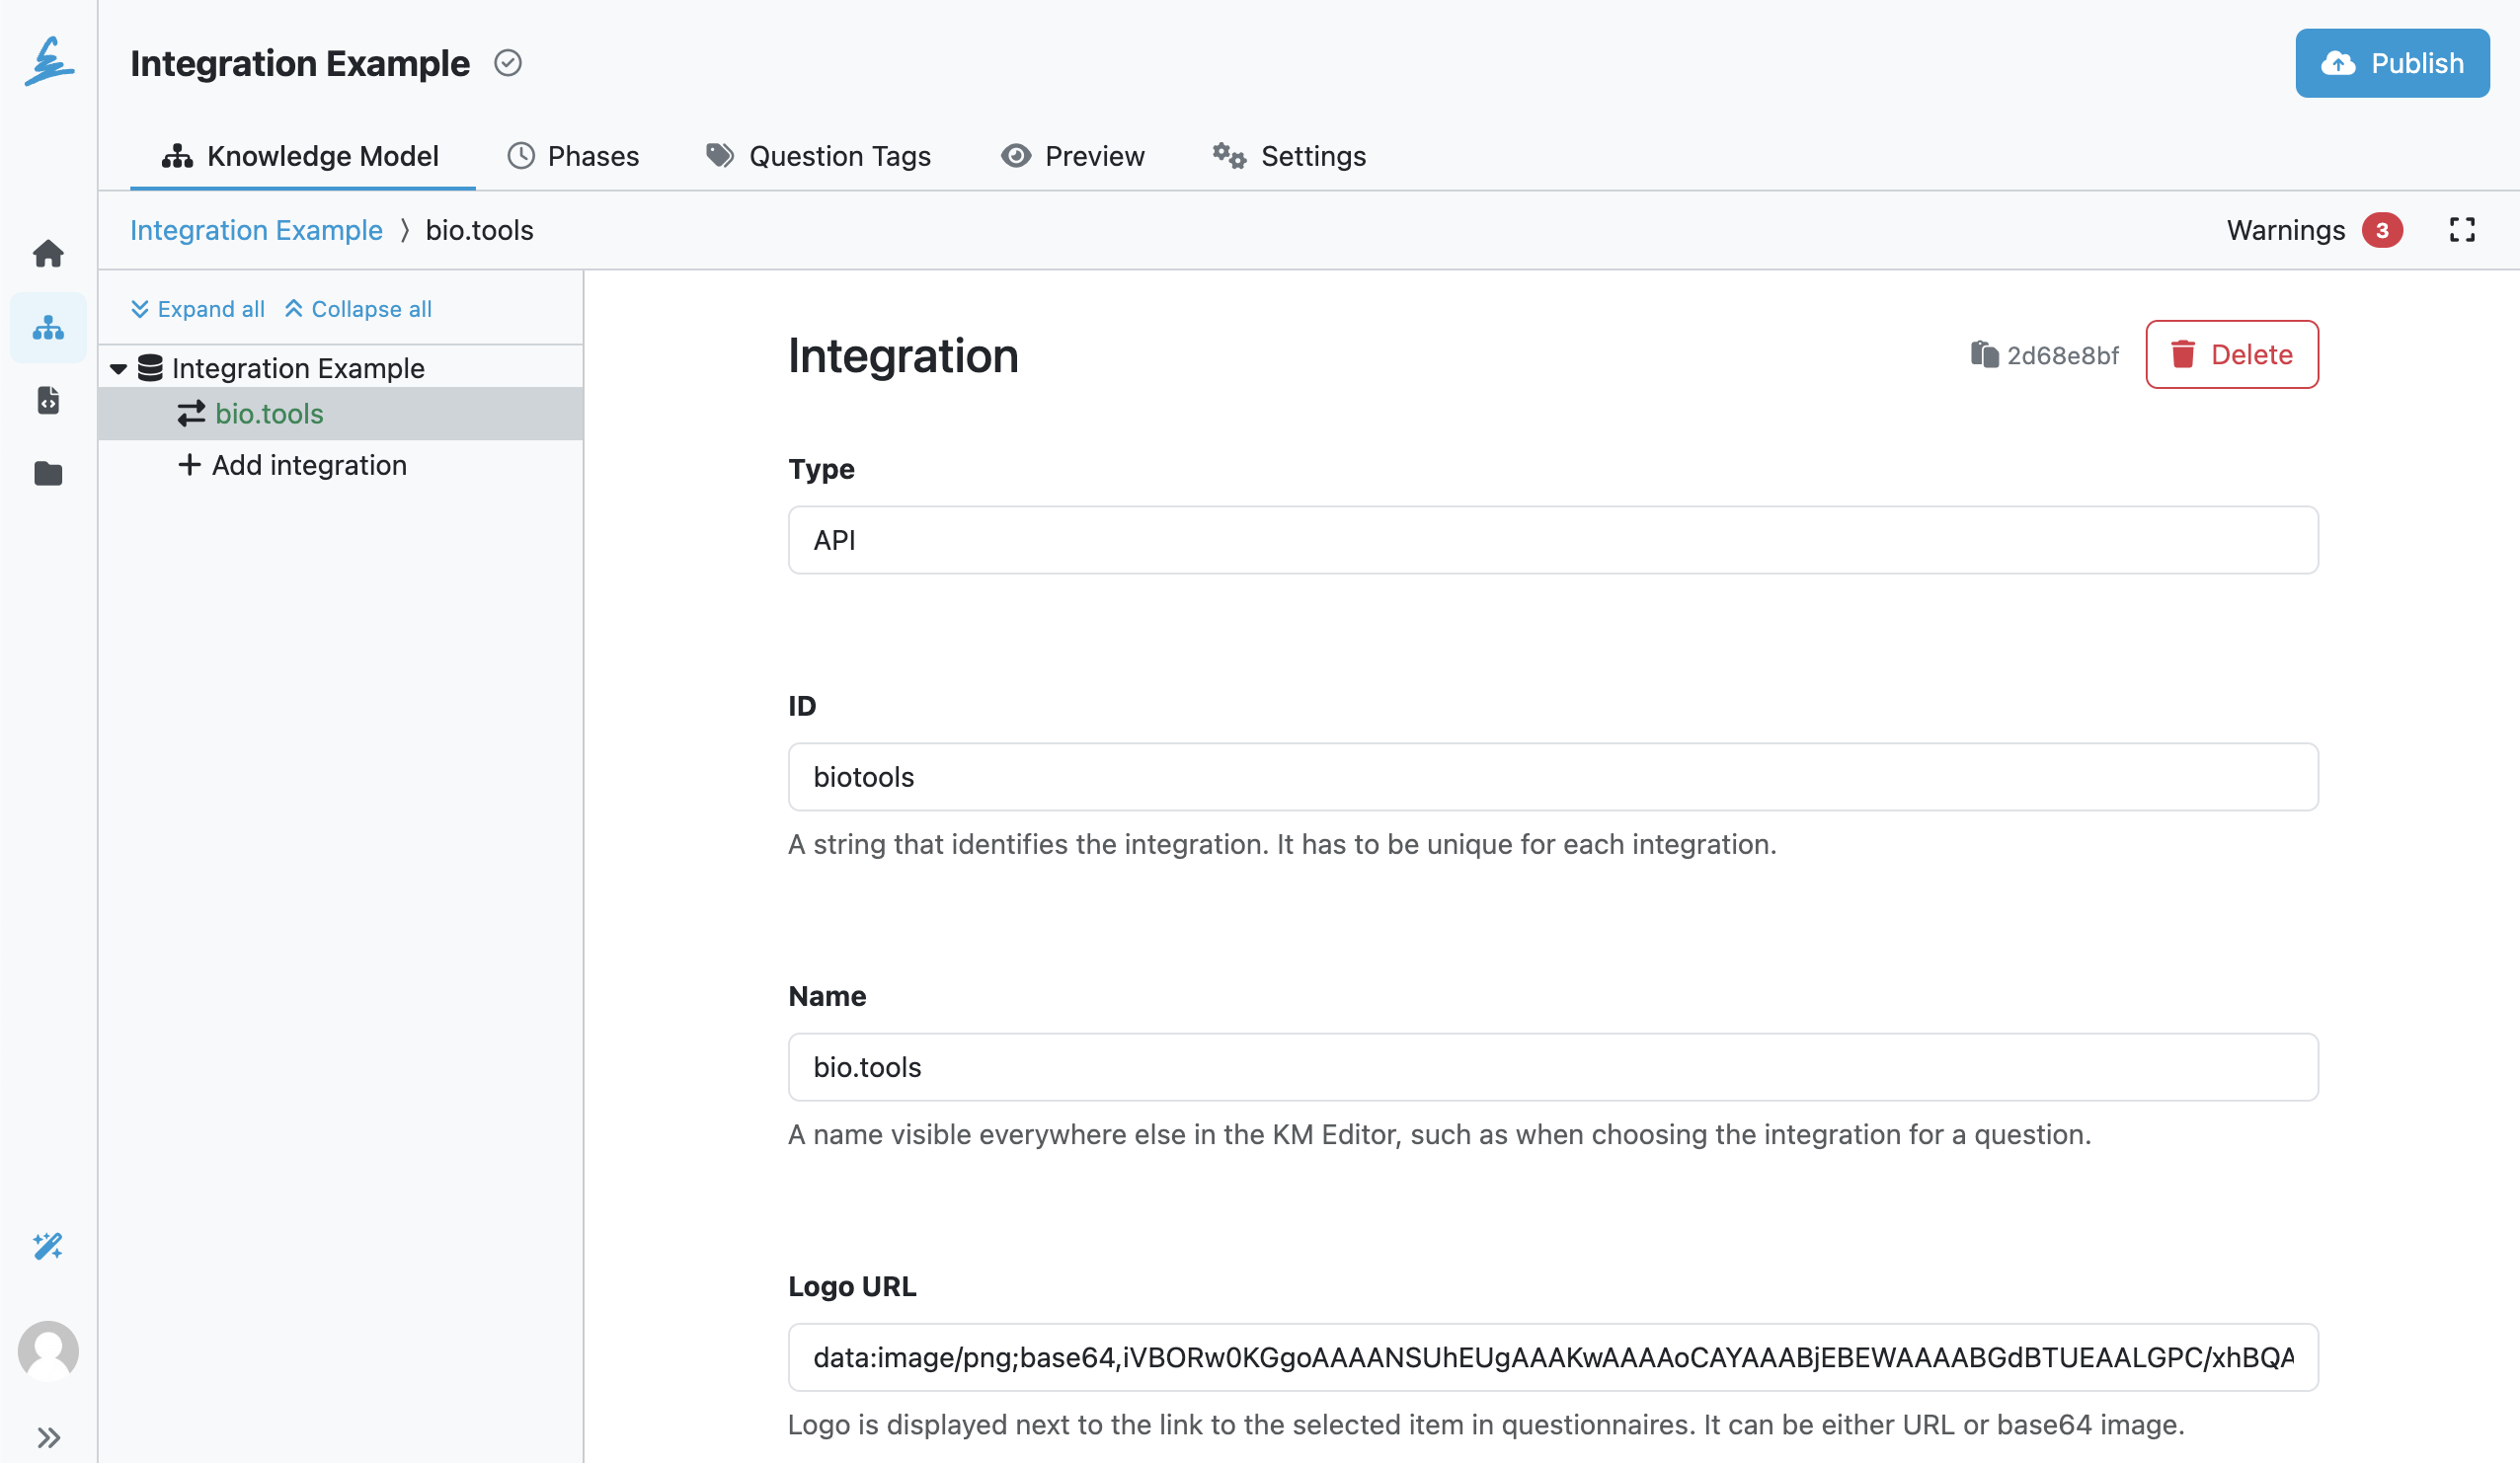
So within the new knowledge model, we create a new integration by clicking on Add integration.
At the beginning of the integration configuration, we choose the integration type. It is set to API by default, so we can leave it like that. The Widget integration type is more complex and requires further implementation on the other service’s side, so we’ll skip it for this tutorial.
We need to fill in ID that identifies the integration and should be unique if there are more integrations and Name that will be visible when choosing this integration for a question. We can fill in biotools for the ID and bio.tools for the Name.
The next field is Logo URL. It is used when something is selected from the integration in the questionnaire. It can be a regular URL when the image is somewhere online or a base64-encoded image. We can use some online service such as this one to convert an image to base64. The advantage of using base64 is that the image is in the knowledge model, and we don’t have to worry about whether the image stays online on a given URL. The disadvantage of base64 is that the encoded image can get quite big (thus increasing the size of our knowledge model), so make sure to resize the image before converting.
For our new bio.tools configuration, we use base64 encoded version. You can copy it from here.
We skip the Props in this basics tutorial and return to it in some further one.
The following section is about request configuration. Before we can do that, we need to understand how bio.tools API works. Luckily, they have nice API documentation we can explore.
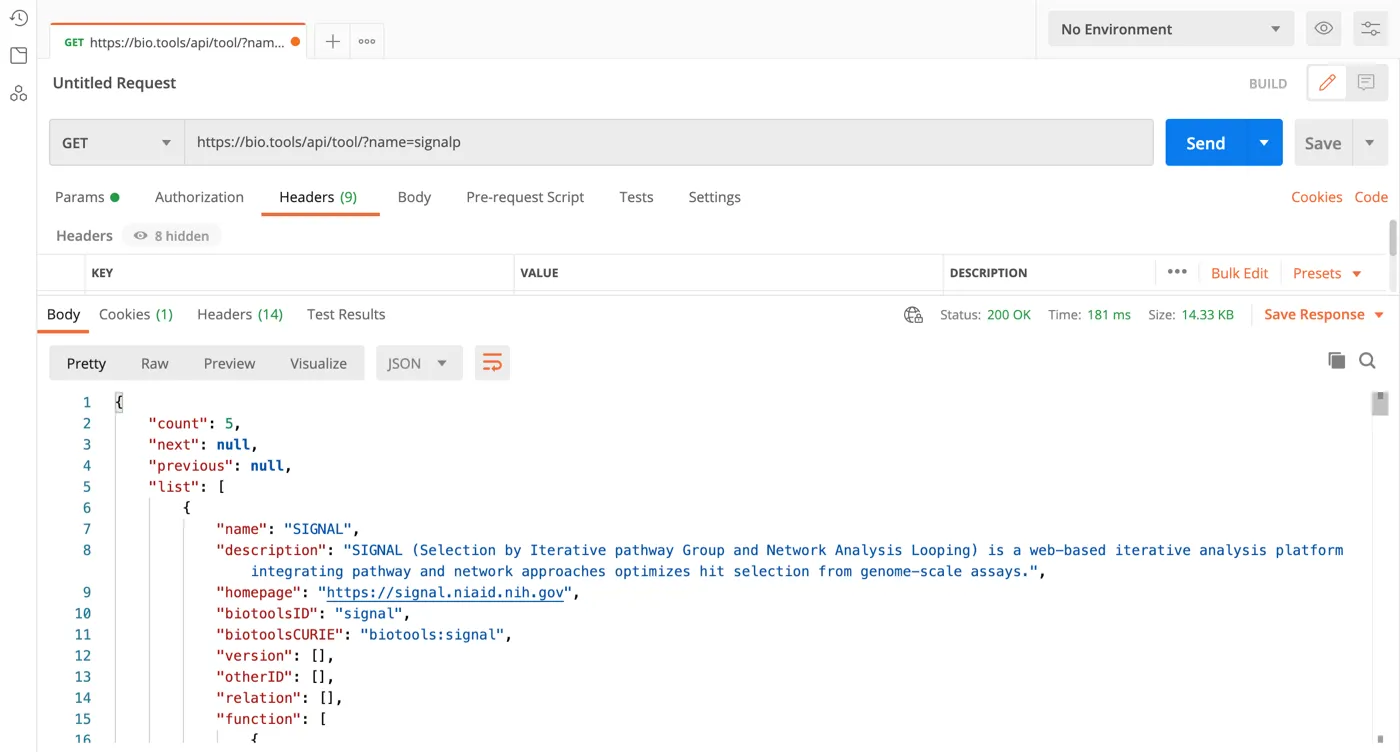
We can quickly find out that we can search using the search term in the URL like this:
https://bio.tools/api/tool/?name=signalp
When we try to make this request in a program like Postman, we can see that the response is an HTML page. We can quickly fix that by adding the correct HTTP Accept header:
Accept: application/json
Now, the result is a JSON object containing a list of items matching the search query, which is exactly what we need.
We can try to change the name parameter to different values and see that it finds different results.
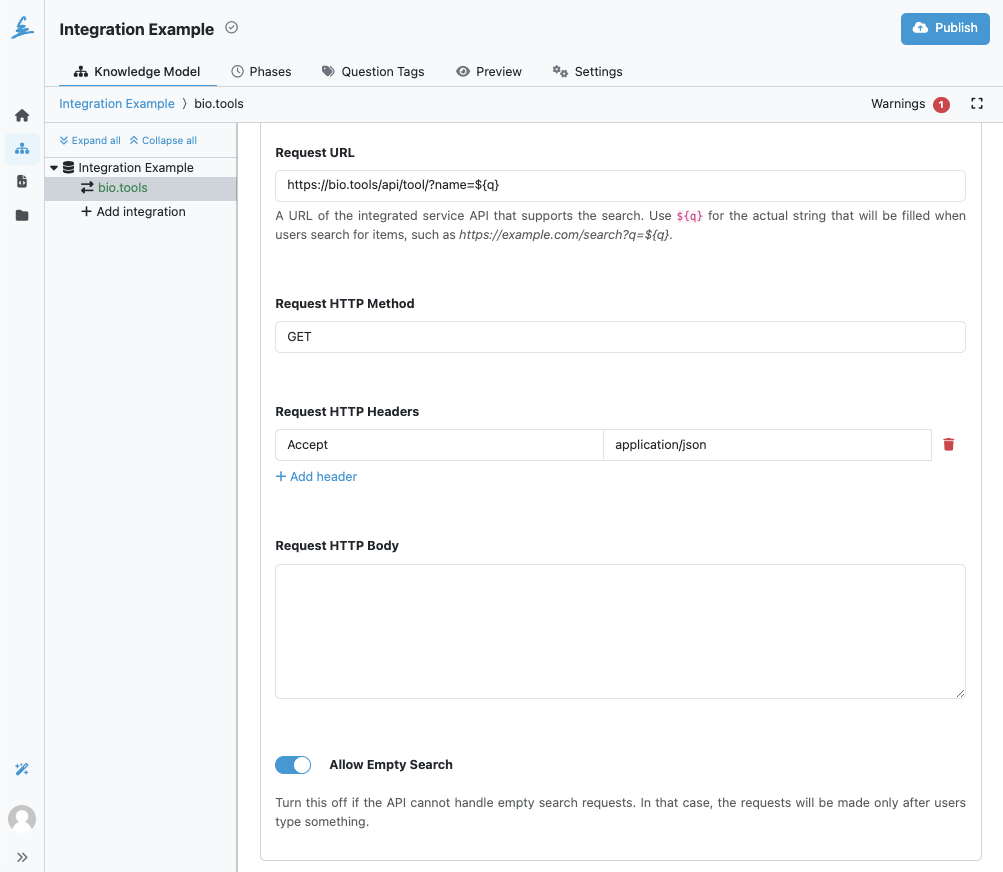
Now when we know how bio.tools API works, we can make the same configuration in FAIR Wizard. However, we can’t hardcode the value in the name parameter because it needs to have the value that the users will later write in the questionnaire. We use the ${q} variable for that. So the Request URL will be:
https://bio.tools/api/tool/?name=${q}
We made a simple GET request in Postman, so we set the Request HTTP Method to GET.
We also need to add Request HTTP Header to have the response in JSON format. So we set Header Name to Accept and Header Value to application/json.
Sometimes, we might need to send a request body. For example, if the request is POST. In that case, we would use the Request HTTP Body field. We could again use the ${q} variable there. We can leave it empty for bio.tools.
Some APIs require us to send some value to perform the search correctly; others will just find some items without any filtering if we send an empty value. Suppose the Allow Empty Search field is checked. In that case, it means that the empty value is sent, and it is searched for the items immediately when the user clicks into the integration question field. When it is not checked, the search is performed after the user starts typing something. As bio.tools can perform the search with the empty value, we can keep this checked.
In the previous section, we configured how to get the data from bio.tools API. In this section, we configure how to transform the response data into something visible in FAIR Wizard.
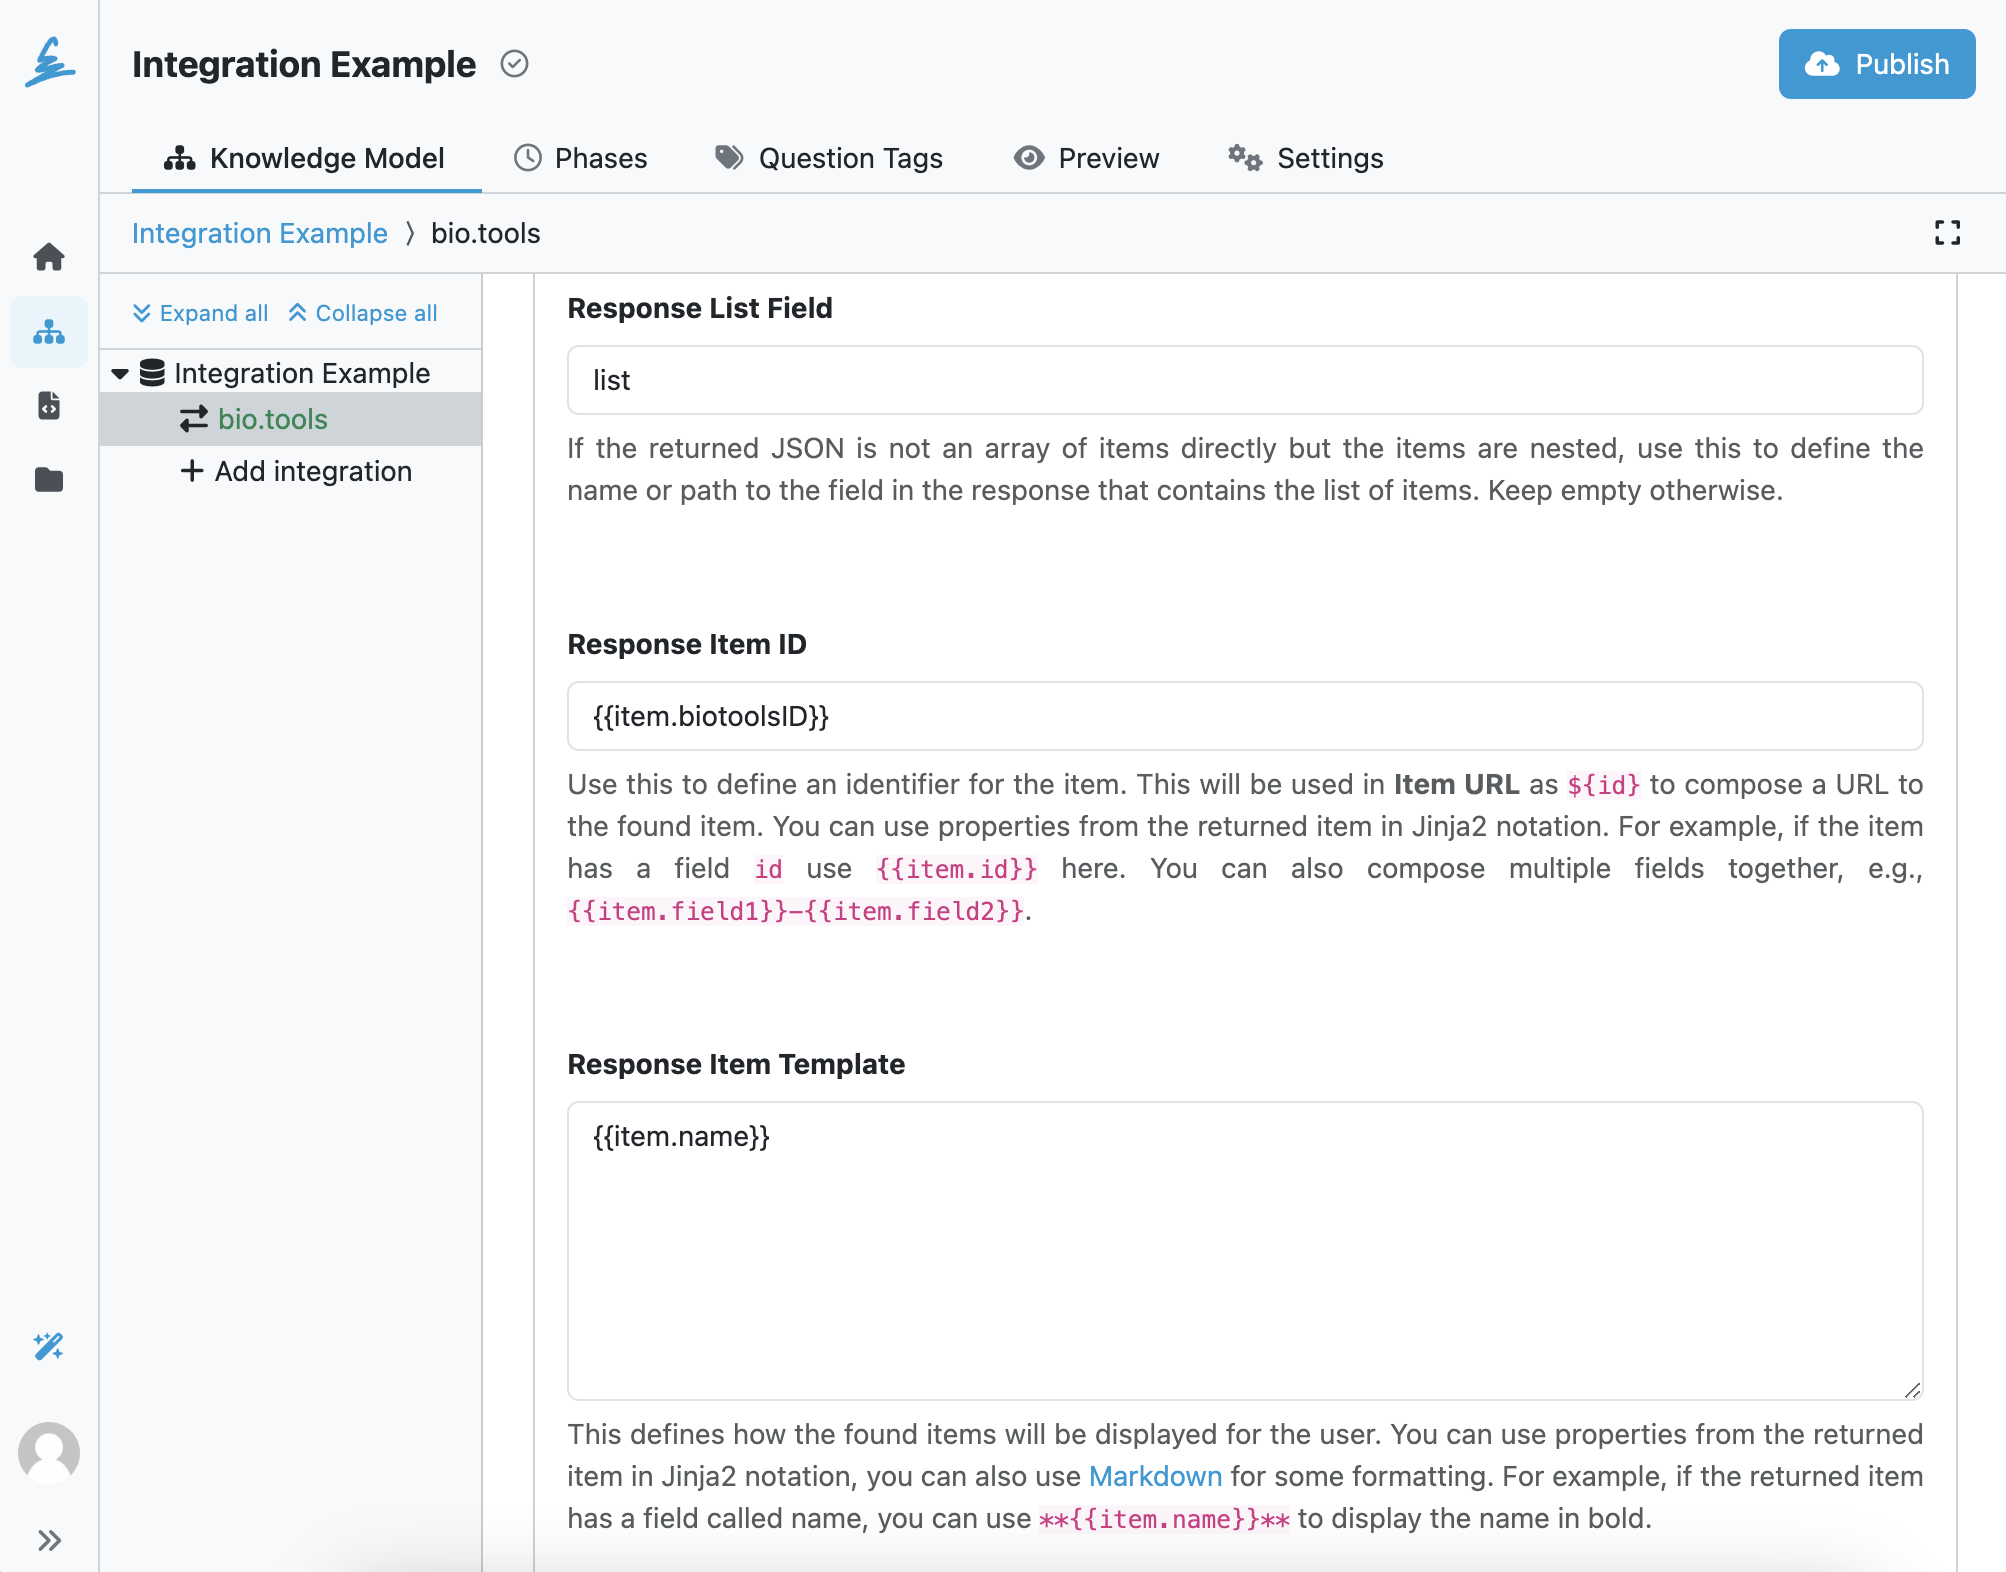
First, we need to configure Response List Field, which describes where the list of returned items is in the response JSON. Some services might return the array of items right away. Then we would keep this field empty. In the case of bio.tools, the response contains some additional metadata. The list of items is under a field called list, so that is what we fill into the Response List Field. If the list field was more nested, we could use dot notation to describe the whole path, such as field1.field2.field3.
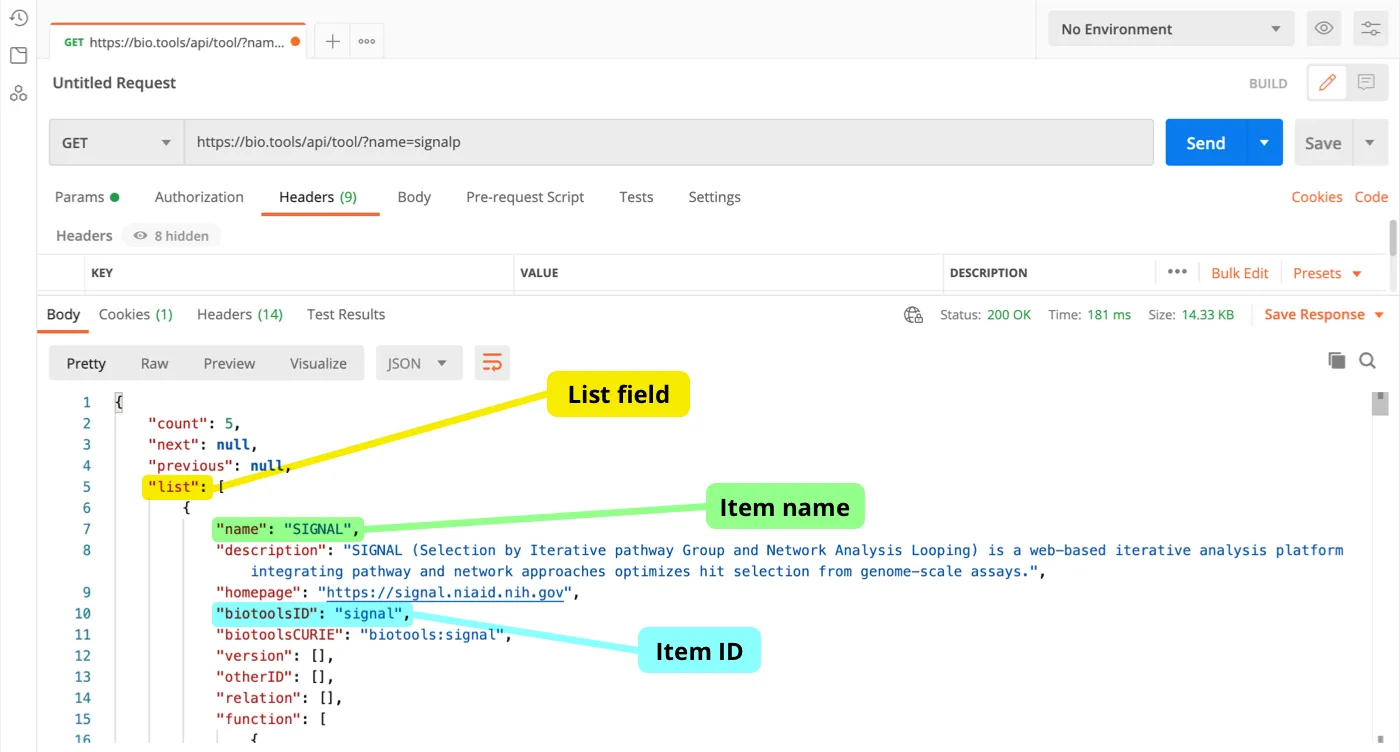
The following field, Response Item ID, describes where in the individual item JSON object is a field that represents an ID of that item. We will later use this ID to compose the URL to the item. We use Jinja2 notation to put together the ID (possibly from multiple fields). In the case of bio.tools, we only need to use a single field, biotoolsID, to compose the item URL. So we can fill in {{item.biotoolsID}}, which then translates to the actual value from the selected item.
The last field in the response configuration is Response Item Template. This is about how the item is presented to the user. We can use Jinja2 notation for item properties and Markdown for some extra formatting. We’ll have a look at more fancy configurations in later tutorials. For now, we simply use the name of the selected item, so we fill in {{item.name}}.
The advantage of the integration question is that the answer is not only the value but also a link to the selected item. In this section, we configure how to compose that link.
In bio.tools, the URL for each item is straightforward. It uses just the biotoolsID of the item, such as https://bio.tools/signal. We configured how to get the item's ID in Response Item ID, and now we can use that value here as ${id}. So the item URL for bio.tools is:
https://bio.tools/${id}
We don’t need to fill any Annotations as these can be used for some advanced things in templates.
Once we start using this integration, we will see here all the Questions using this integration.
We now have the integration ready to be used so that we can add an integration question. Navigate back to the knowledge model (everything is automatically saved in the knowledge model editor), click on Add chapter, and give that chapter some name, such as Chapter 1. Then click on Add question.
The first field defines the question Type. As we want to use our new integration, change it to Integration. We give the question some Title, such as What tools will you use?.
We can skip most of the other fields up to Integration. There we select our newly configured integration bio.tools. Now we're all set.

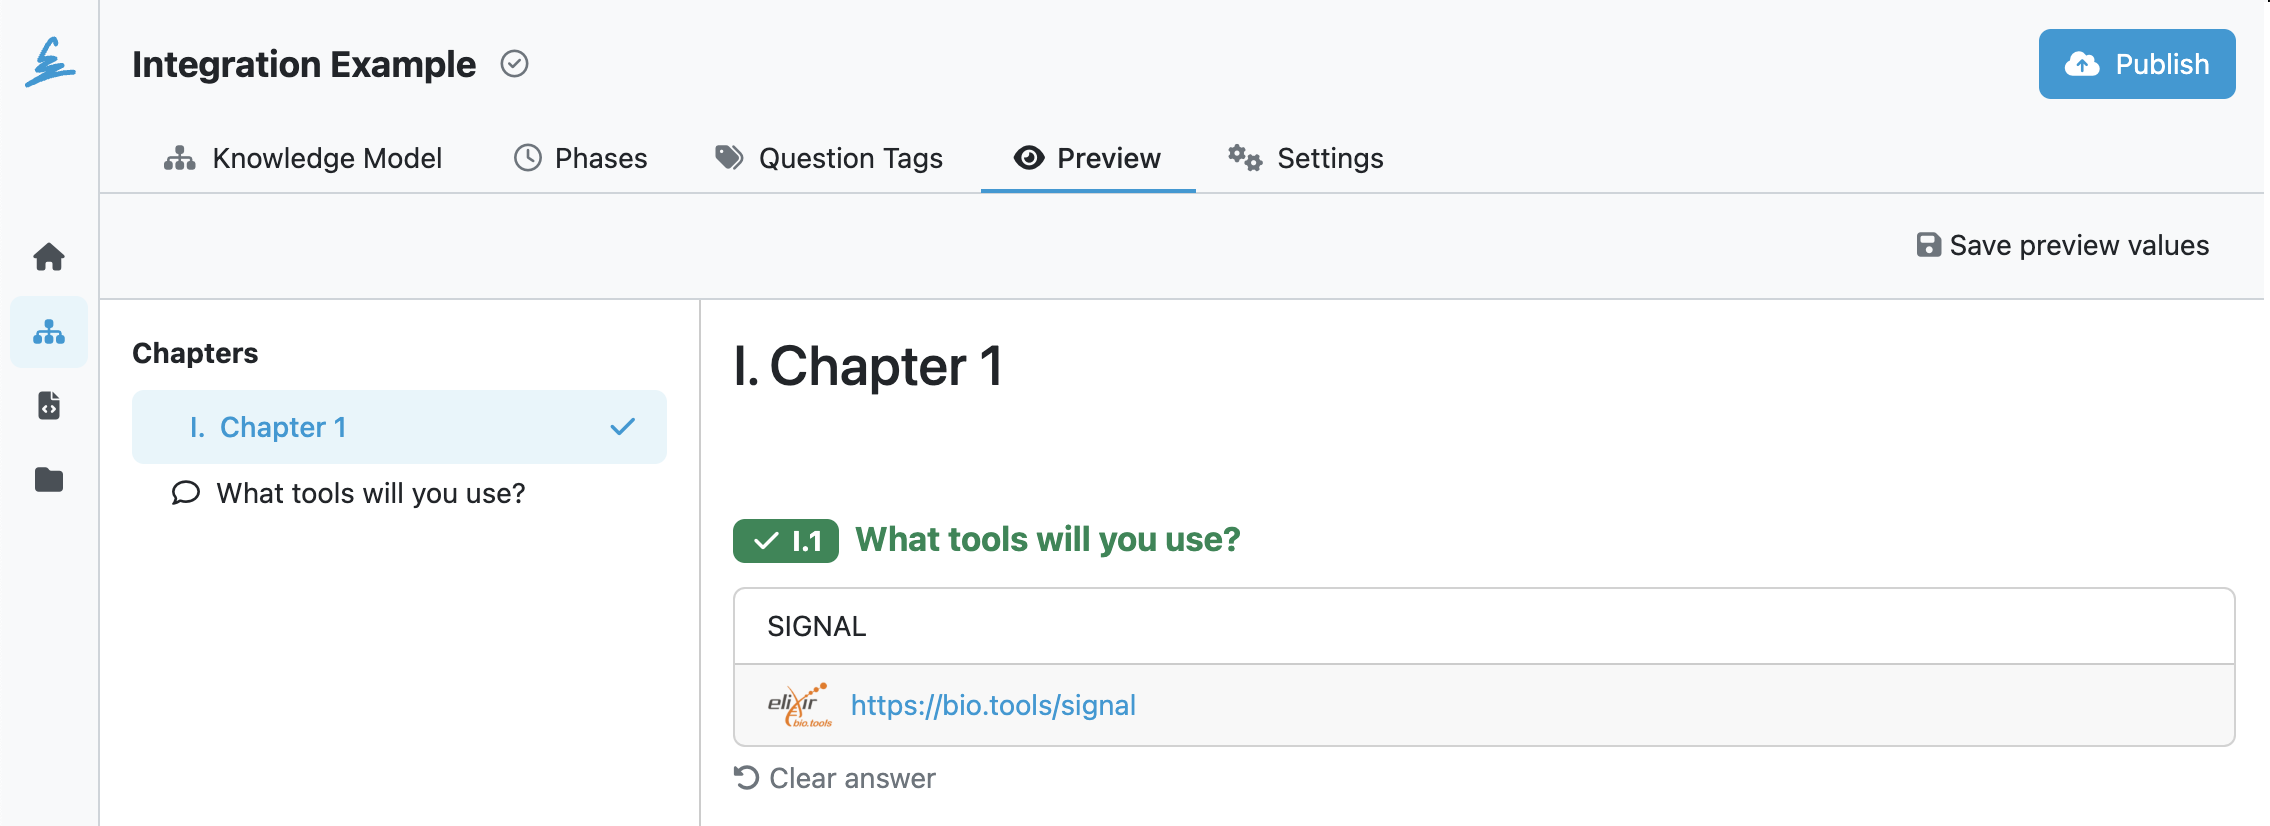
We can now navigate to the Preview tab in the knowledge model editor. We should see our chapter with a single integration question. If we click on the input field, it should search the bio.tools API and offer some options. When we start typing, it should begin to filter the results based on what we search for.
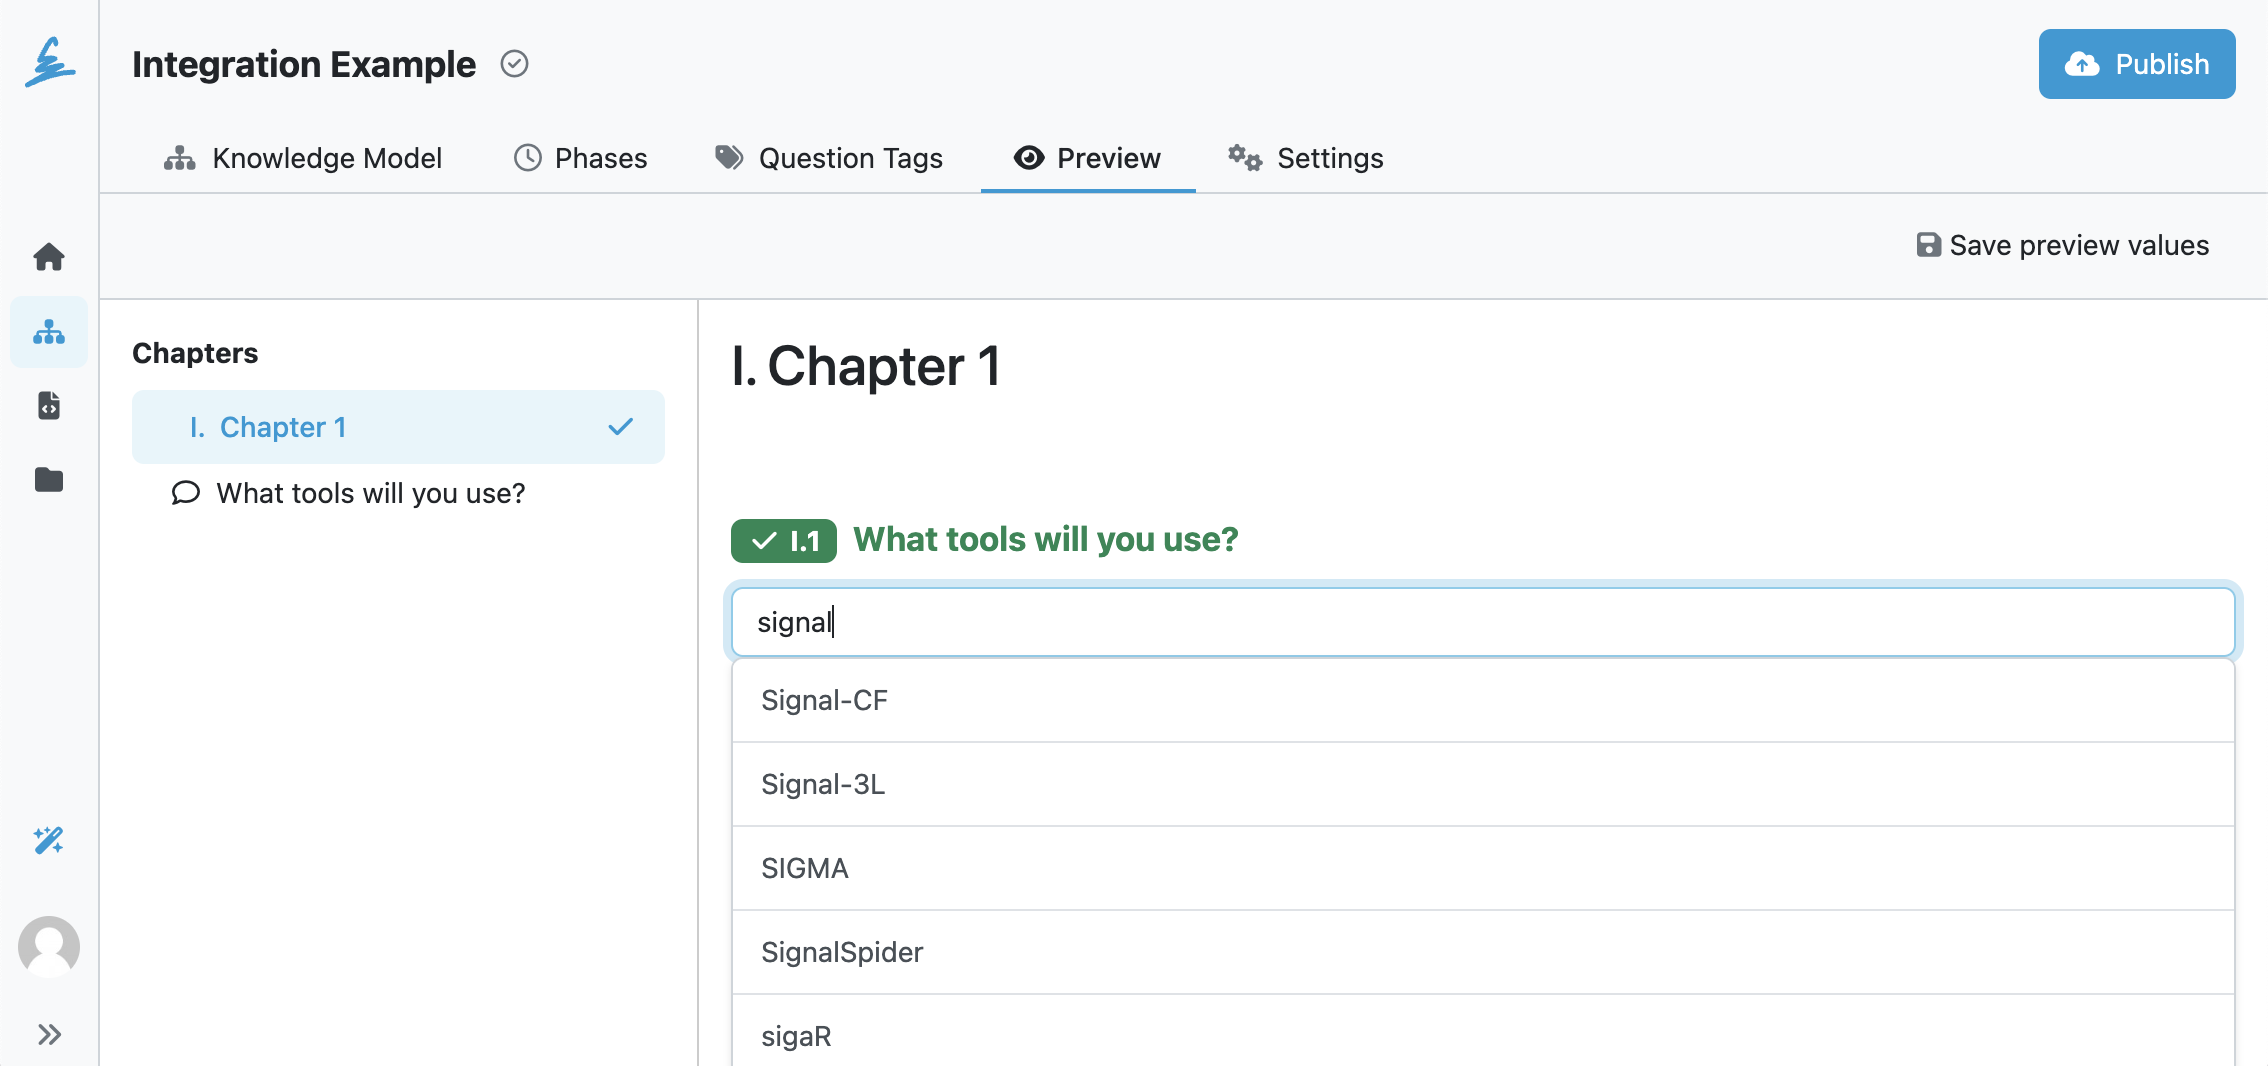
Now when we click on one of those items, the response should contain not only the title of that item but also a link to bio.tools that we can open.
In this tutorial, we went through how to configure an integration in FAIR Wizard knowledge model editor and how to use it with an integration question. We can use this approach to integrate FAIR Wizard with any repository that fulfills the requirements in a few easy steps: